Monday, May 30, 2005

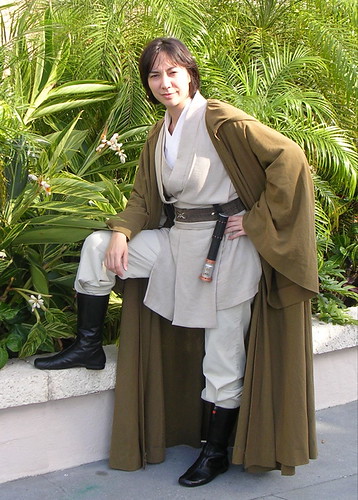
Star Garb, Episode II: Attack of the Clothes

With Star Garb, Episode I: A New Cloak behind me, I move deeper into costuming territory with Episode II: Attack of the Clothes.

costume shot

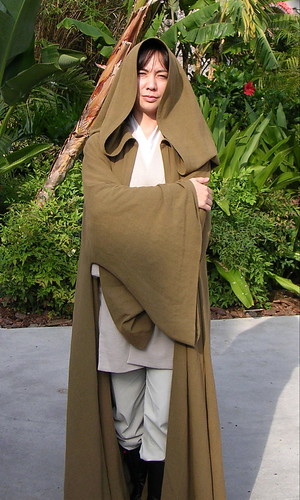
Prequel Jedi garb is all about texture and layers. Pulling off this costume depended on finding appropriate (and affordable!) fabric. So during my original fabric reconnaissance I carried a notebook with sketches and yardage requirements and collected swatches. I hit the jackpot with more $1.99/yard finds: a creamy crinkle cotton, perfect for the inner tunic; and a drapey linen/flax, also with a crinkle texture, for the outer pieces.

swatches.JPG

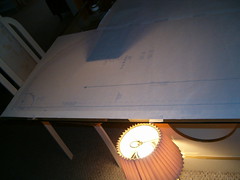
Once I decided on patterns, I dismantled my green plaid mock-up cloak and used it to make muslins of the tunics, basting together just enough to determine what changes I would make to the patterns before cutting the real fabric.

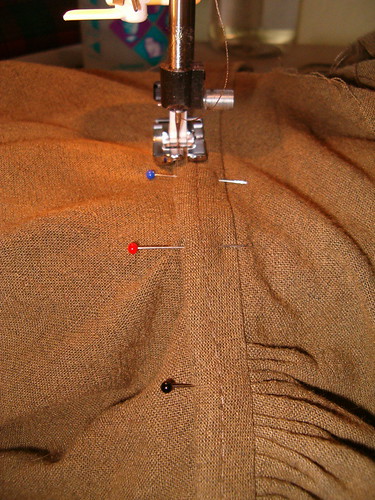
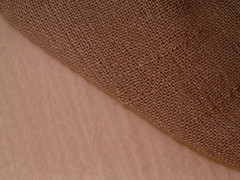
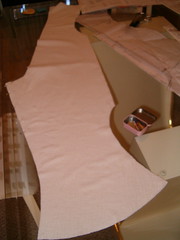
I used Folkwear #134 Thai Blouse for the undershirt. LOVE this pattern! Every seam is a straight line, and the triangular panels in front add interest. The panels tie on the sides, which keeps the neckline secured nice and high where I want it. Like the cloak, the front and back are one piece (no shoulder seam), with a seam up the back. Below, the right front/back piece (the left side of the photo is the center back seam).

one piece.JPG

I made only a few minor changes to convert it to costume: (1) Added about 5 inches to the sleeve length and gradually narrowed the last few inches towards my wrist, so it would bunch up. (2) Reversed the position of the ties so the blouse would close properly for a Jedi costume, left panel over right. (3) Instead of sewing the collarband to the wrong side and top-stitching it down on the right side according to instructions, I attached it to the right side and slip-stitched it on the wrong side so no stitches would show. I thought this was the most attractive finish for the crinkle cotton.

thai blouse.JPG
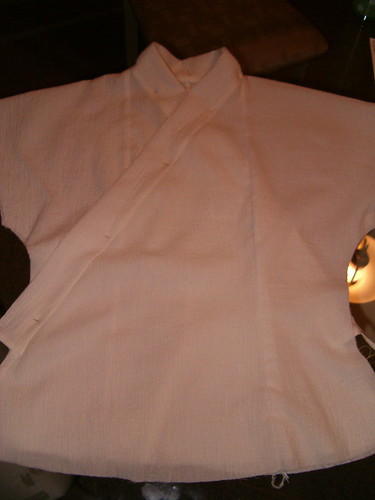
Above, the neck binding pinned in place. As an added bonus, the finished shirt will double as a very pretty blouse in my everyday wardrobe!

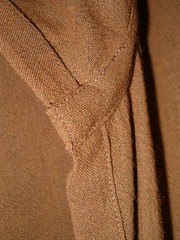
The outer tunic began as Butterick 4072. I lengthened the pattern by about 5 inches so it would fall to mid-thigh; discarded the sleeve piece (not full enough) and created my own (24 inches at the hem, which I placed at my knuckles). The biggest change was to the armhole. The original pattern had the armhole seam dropped halfway to my elbow. I wanted to raise it without losing the ease in the body, so after studying reference photos, I decided to put a "tuck" in the shoulder (a la Obi-Wan) by tacking the armhole seamline under at the actual point of my shoulder. Still, there was too much to tuck. So I took my neck-to-shoulder measurement, added 2 inches (plus seam allowances), and made that my new shoulder seam. Then I re-drew the line from the armpit to the new top-of-shoulder.

sleeve tuck
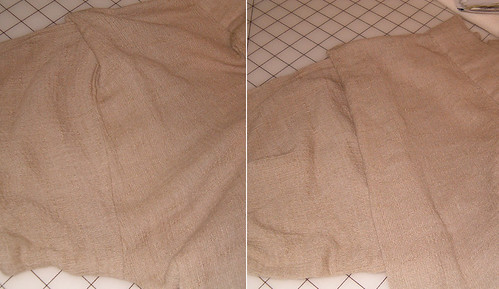
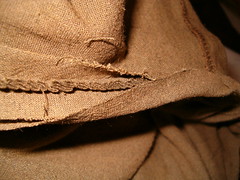
Left, you can see where I tacked the top but I've pulled the bottom out so you can see the armhole seam. Right, the finished tuck. After attaching the sleeve, I wound up tacking the top of the armhole just above the point of my shoulder and along the shoulder seam, so it would lay flat along the slope of my shoulder (its own weight was causing it to flip up that last inch).

The drapey linen was a little tricker to work with, especially when sewing across the grain (and therefore the crinkle). I sewed twill tape into the shoulder seams to keep them from stretching out. I also interfaced the collar band and finished it by hand. On both tunics, I serged the seams and raw edges, minimizing bulk at the hems. I used a 3 inch hem on the full outer tunic sleeves and blind-hemmed them in place.

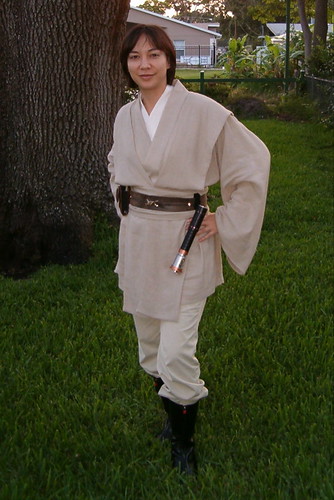
The tabards and obi are basically long sashes, folded in half and sewn up one side and both ends. The tabards are cut with the grain and the obi on a slight bias. After sewing each piece into a tube, pressing the seams open and turning it right-side out, I slip-stitched the opening closed. I added a tie on each end of the obi to hold it in place until I could buckle a belt over it. With only a day to go before the movie opening, I considered skipping the tabards, but was glad I didn't. They really were a finishing touch, smoothing over the whole look.

Stay tuned for Episode III: Accessories of the Jedi!

Tuesday, May 24, 2005

More chances to dress up!

Woo-hoo! I just learned that my costume was approved for membership in the Rebel Legion. It's the sister organization to the 501st Legion, of which my friends Gabby and Klaus are members. To view my costume/member profile, do a "member search" for me on the Rebel Legion website, or click here.

You realize what this means... more chances to DRESS UP!!!

Star Garb, Episode I: A New Cloak

Well, now that the movie premier has come and gone, I finally have a few moments to post my costume notes! Look for Episode II: Attack of the Clothes and Episode III: Accesories of the Jedi coming soon to a computer screen near you...

Jedi Cloak

I got the bug to dress up for the premier of Star Wars Episode III: Revenge of the Sith a scant three weeks before. After sketching ideas for a "girl Solo" outfit and custom Jedi garb, I decided to start with a cloak. I figured if I didn't have time for anything else, the cloak would cover my street clothes and I'd have enough of a costume to evoke the look.

A web search landed me at The Padwan's Guide to Star Wars Prequel Costumes where I found more than enough information to draft a pattern.

preparing the pattern

The entire cloak is in only three pieces: two sides joined at the center back and side seams, and one piece for the hood. I started with McCall's 8936, traced a piece for the back, and laid it shoulder-to-shoulder with the front, eliminating the shoulder seam. Then I drew in a sleeve using measurements for the desired wrist opening and sleeve length from my neck (plus hem). The bottom of the sleeve (the seam) was so short that I decided to shape it for style and the illlusion of length. It flows nicely and looks better than a straight line.

Next I made a muslin out of an old green plaid sheet. It resembled some sort of bizarre Jedi bathrobe or pajamas! I'm glad I took the time to do a mock-up. I was able to make significant changes to the shape of the sleeve and hood (which I transferred to my pattern) without wasting my "real" fabric.

Now, April in Florida is not the best time of year to find fabric appropriate for a cloak! I waited to make the pattern until I was sure I would have fabric to work with. After much running around town, I found a heavy linen-cotton blend that I thought would drape well, but not be too warm, in the bargain section--$1.99/yard! Which was fantastic, because the whole project took about 7 yards. I hunted through three stores to find enough. Tina suggested I machine wash and dry it for a softer look and less wrinkling (as well as pre-shrinking). In the process, it shed dye, conveniently removing a slight green tinge and leaving it more the color I wanted.

Finally, time to cut!

cutting the cloak

With Tina's help, I laid two layers of the linen down so I could cut both pieces at the same time. The only surface large enough to do this was the floor. This was probably the single most time-consuming part of the whole project, and hardest on my knees!

Construction went pretty quickly. I decided to serge all the seams, which simplified the finish. Although there were only three seams (back and sides), they were very long and took a while to press (as sewn, open, to one side, ad nauseum... ;> But pressing is a step I won't skip; it really is what gives a garment a professional look.). I got all the cutting and major construction done during class, about four hours.

The hood, which started as a simple rectangle, proved to be the most complicated part of the project. Not difficult, just... interesting. Once I decided on an approach, the rest fell into line. First I sewed up the back seam like a dart, so it disappears at the top of the hood. Then I used a ruffler foot to get nice, even gathers at the neckline. It took a little babysitting to get the heavy linen to feed through the foot, but the result was worth it. I left about four inches on each side of the hood ungathered, for a smooth look in front.

hood pleats
Above, the pleated hood pinned to the cloak neck.

Since I wanted to bind the neck seam, I basted a bias strip to the hood before attaching it to the cloak (so the binding would be caught in the same seam). I pressed the seam towards the cloak side. Then I turned the raw edge of the binding under and folded it over the the raw edges of the cloak and hood.

bias binding

I edge-stitched the binding in place on the cloak side (thank God for the left-edge topstitching foot!), and also the seam edge so they would match. Below, the cloak is on the left and hood on the right. You can also see the line of basting (down the middle) from the bias strip. The trickiest part here is to guide the fullness of the cloak fabric so that you don't accidentally stitch in a pleat.

finishing the seam

Finally, hems! Well, not quite finally. After binding the neck edge, I realized the best way to reduce the bulk that would result in a double-fold hem was to pick out enough of the seam to hem the hood and cloak edges separately, then finish the binding over top. It turned out very neatly (below).

binding.JPG

To get the hood edge to create a smooth outline around my face, I inserted polyester horsehair braid in the hem. It didn't add any weight or stiffness, but gave the edge enough stability to keep it from collapsing into my face.

With my boots on, Tina pinned up the bottom hem. I trimmed off all but about 2.5 inches and still it was so full the edge would have to be gathered when I folded it up. I changed the differential feed on the serger to do some of that work for me. In the end it was enough that I could ease in the rest on the sewing machine, and I was able to do a blind hem.

Last, but not least, I picked out all the visible basting. I'm fanatical about that, I don't care if the basting thread is the same color as the fabric!

Here's a shot that shows the fullness and drape:

Jedi garb

At Pleasure Island on opening day, a steady breeze kept the cloak billowing out behind me as I walked. It felt wonderful (I love the feel of heavy clothes and a swirling hem) and must have looked pretty cool, too, because a lot of people kept asking to take photos with me!

Lastly, another great view of the full sleeves:
More fun with Photoshop 2

End Episode I!

Wednesday, May 11, 2005

I'm still here... are you?

Well, I didn't drop off the face of the earth. I just got stuck. Mostly because I finally got brave and gave out the URLS to my blogs... which of course scared me right out of updating them for fear anyone would actually read them!

But, I have been busy sewing! Summer clothes that fit, and my latest costume project, Jedi garb for the Star Wars premier. Photos later; for now here's a link to a great source for would-be SW costumers:

www.padawansguide.com
See you at the movies!