
Star Garb, Episode I: A New Cloak
Well, now that the movie premier has come and gone, I finally have a few moments to post my costume notes! Look for Episode II: Attack of the Clothes and Episode III: Accesories of the Jedi coming soon to a computer screen near you...
I got the bug to dress up for the premier of Star Wars Episode III: Revenge of the Sith a scant three weeks before. After sketching ideas for a "girl Solo" outfit and custom Jedi garb, I decided to start with a cloak. I figured if I didn't have time for anything else, the cloak would cover my street clothes and I'd have enough of a costume to evoke the look.
A web search landed me at The Padwan's Guide to Star Wars Prequel Costumes where I found more than enough information to draft a pattern.
The entire cloak is in only three pieces: two sides joined at the center back and side seams, and one piece for the hood. I started with McCall's 8936, traced a piece for the back, and laid it shoulder-to-shoulder with the front, eliminating the shoulder seam. Then I drew in a sleeve using measurements for the desired wrist opening and sleeve length from my neck (plus hem). The bottom of the sleeve (the seam) was so short that I decided to shape it for style and the illlusion of length. It flows nicely and looks better than a straight line.
Next I made a muslin out of an old green plaid sheet. It resembled some sort of bizarre Jedi bathrobe or pajamas! I'm glad I took the time to do a mock-up. I was able to make significant changes to the shape of the sleeve and hood (which I transferred to my pattern) without wasting my "real" fabric.
Now, April in Florida is not the best time of year to find fabric appropriate for a cloak! I waited to make the pattern until I was sure I would have fabric to work with. After much running around town, I found a heavy linen-cotton blend that I thought would drape well, but not be too warm, in the bargain section--$1.99/yard! Which was fantastic, because the whole project took about 7 yards. I hunted through three stores to find enough. Tina suggested I machine wash and dry it for a softer look and less wrinkling (as well as pre-shrinking). In the process, it shed dye, conveniently removing a slight green tinge and leaving it more the color I wanted.
Finally, time to cut!

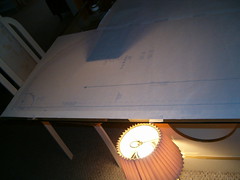
With Tina's help, I laid two layers of the linen down so I could cut both pieces at the same time. The only surface large enough to do this was the floor. This was probably the single most time-consuming part of the whole project, and hardest on my knees!
Construction went pretty quickly. I decided to serge all the seams, which simplified the finish. Although there were only three seams (back and sides), they were very long and took a while to press (as sewn, open, to one side, ad nauseum... ;> But pressing is a step I won't skip; it really is what gives a garment a professional look.). I got all the cutting and major construction done during class, about four hours.
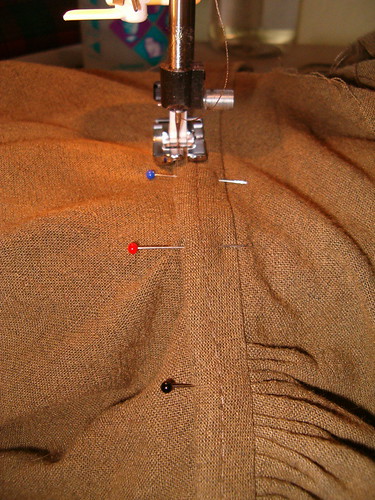
The hood, which started as a simple rectangle, proved to be the most complicated part of the project. Not difficult, just... interesting. Once I decided on an approach, the rest fell into line. First I sewed up the back seam like a dart, so it disappears at the top of the hood. Then I used a ruffler foot to get nice, even gathers at the neckline. It took a little babysitting to get the heavy linen to feed through the foot, but the result was worth it. I left about four inches on each side of the hood ungathered, for a smooth look in front.

Above, the pleated hood pinned to the cloak neck.
Since I wanted to bind the neck seam, I basted a bias strip to the hood before attaching it to the cloak (so the binding would be caught in the same seam). I pressed the seam towards the cloak side. Then I turned the raw edge of the binding under and folded it over the the raw edges of the cloak and hood.
I edge-stitched the binding in place on the cloak side (thank God for the left-edge topstitching foot!), and also the seam edge so they would match. Below, the cloak is on the left and hood on the right. You can also see the line of basting (down the middle) from the bias strip. The trickiest part here is to guide the fullness of the cloak fabric so that you don't accidentally stitch in a pleat.
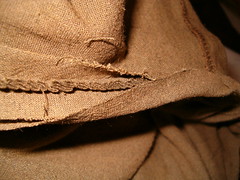
Finally, hems! Well, not quite finally. After binding the neck edge, I realized the best way to reduce the bulk that would result in a double-fold hem was to pick out enough of the seam to hem the hood and cloak edges separately, then finish the binding over top. It turned out very neatly (below).
To get the hood edge to create a smooth outline around my face, I inserted polyester horsehair braid in the hem. It didn't add any weight or stiffness, but gave the edge enough stability to keep it from collapsing into my face.
With my boots on, Tina pinned up the bottom hem. I trimmed off all but about 2.5 inches and still it was so full the edge would have to be gathered when I folded it up. I changed the differential feed on the serger to do some of that work for me. In the end it was enough that I could ease in the rest on the sewing machine, and I was able to do a blind hem.
Last, but not least, I picked out all the visible basting. I'm fanatical about that, I don't care if the basting thread is the same color as the fabric!
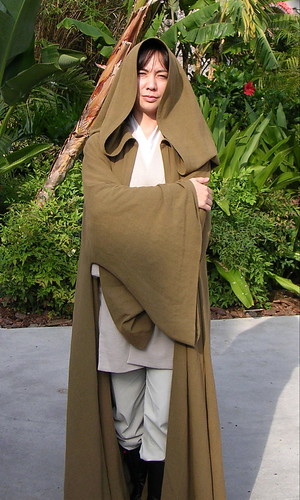
Here's a shot that shows the fullness and drape:

At Pleasure Island on opening day, a steady breeze kept the cloak billowing out behind me as I walked. It felt wonderful (I love the feel of heavy clothes and a swirling hem) and must have looked pretty cool, too, because a lot of people kept asking to take photos with me!
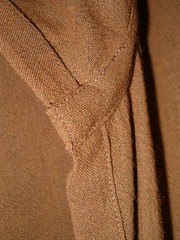
Lastly, another great view of the full sleeves:

End Episode I!
posted by highpowermom @ 1:04 AM
![]()
![]()
2 Comments:
Wow that looks VERY nice I have been trying to make a cloak and testing out a few types of material and your finished product looks VERY nice I am impressed I am going tobook mark your site for future reference!
Thanks! And feel free to email me anytime if you need more info or help. :)
Post a Comment
<< Home