Wednesday, July 26, 2006

Stunt Dressing

"Stunt dressing" -- I like it. it sounds so much more dangerous than "costuming"!
The Dark Salon: My Friends Are Stunt Dressers

Wednesday, June 07, 2006

Trial by Dyer

Spent the last two days at Pandora's working up the courage to dye my Hoth Leia jumpsuit. I didn't want to color it so much as "age" it a little, to take the blinding edge off the brilliant white. Pandora was over last week and when I mentioned this project, she volunteered to help. She makes art dolls and has done a lot of tinting, barely dying fabric for doll skin. Plus she has a top-loading washer which we could fill with water, the one feature I gave up when I went to my wonderful new front-loader!

We spent hours dyeing trial swatches of the cotton blend suit and silk vest in taupe and tan dye. We started with a half-teaspoon of RIT powder dye in a large washer load of water, and were down to a quarter-teaspoon by the time we quit yesterday. I had no idea the stuff was so concentrated! Scott suggested we try the liquid dye to get more consistent color, since we were using such small amounts that there was no way to know if the color grains were evenly distributed. Today we started with half as much of the liquid dye, thinking it was twice as strong as the powder, but it turned out to be only half as strong. So we went back to a half-teaspoon. The color was a lot more even and less pink than with the powder, especially on the silk.

In the final load, we upped the amount of dye another "dash" (eighth-teaspoon; Pandora's measuring spoons are actually labeled this way!) since there would be a lot more fabric in the load. It didn't look like dyeing; it looked like washing clothes in well-water, tinted yellow from too much iron. Still, we ran an extra rinse (I think the "dash" may have been a "pinch" too much!) before drying the jumpsuit.

dye trials

Above, the three large pieces across the top are a swatch of the original silk vest, original bright white jumpsuit, and the sleeve of the final dyed jumpsuit. The smaller swatches along the bottom are from our trials.

I think it turned out pretty well, and I'm satisfied. Which is good, considering I've never dyed anything before and was terrified of ruining the suit after all the work that went into it! I think I'd like to tint the vest eventually, but I have to do more experimenting to get the right recipe for that. For now, there is *just* enough contrast between the suit and vest that I'm going to leave it alone.

The hours with Pandora flew by! We seem to have a lot in common, from sewing to experiments in food. Stanley came home this evening on his dinner break and they invited me to stay for yummy BLTs and the most luscious cantaloupe I've ever tasted (and I don't like cantaloupe!). I told them both that they are very easy people to fall in with! I'm very glad Pandora hung on to my number for so long and that she called me when she did. Did I mention she also gave me all of her Viking embroidery designs? :)

Friday, April 28, 2006

Jedi Leatherworking Workshop

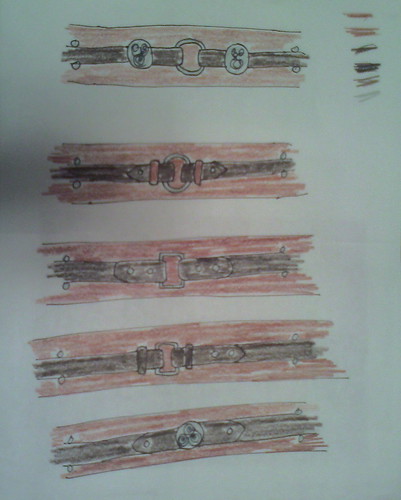
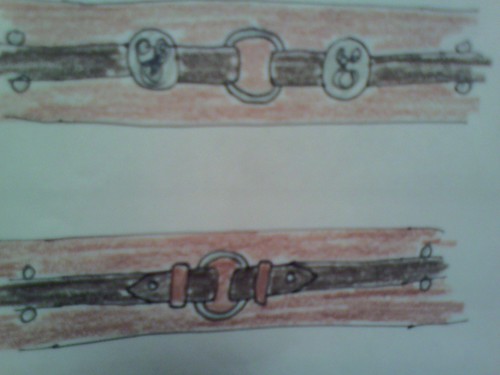
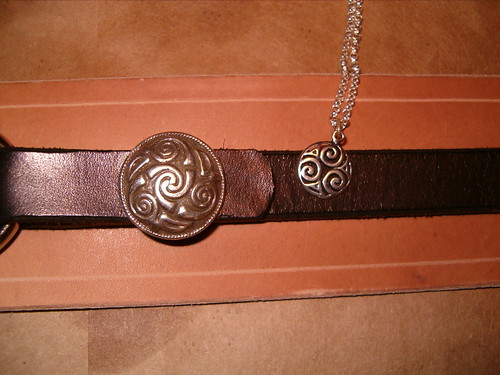
Today Russ, Jessie, Jose and I delved into a little Jedi arts-and-crafts. Peggy forgot and slept in! It was a very long day--we met at Tandy Leather shortly after 11AM and left at 8PM--but the hours flew by as we measured, cut, dyed, punched, set and chatted away. Jessie and I both found the activity relaxing (kind of like sewing), but we were both showing wear at the end of the day! Eric at Tandy was generous enough to stay and help us finish after the store closed at 6PM.

We spent the first 3-4 hours making decisions about our hardware, preparing all the pieces, and dyeing them. Then we broke for a yummy lunch at Steak-n-Shake across the street while our dye jobs dried. After that we assembled and finished the belts, divvied up the leftover supplies and cashed out. (Photos of the workshop here.)

I couldn't find a buckle I liked, but I had seen a couple of ring-and-loop closures on fashion belts I liked. Also, I like the way Scott's rifle slings look after he treats them with mink oil, so I decided to do the same to my main belt instead of dyeing it. Here are a few ideas I sketched using a ring, rivets and/or conchos with a two-toned color scheme:
136648703 D1Cddabe9F

My final design wound up being a combination of the first two sketches:
136648617 51A6C68Eef 136649364 6B482B1390 O

I chose a warm chocolate brown for the narrow belt, but even with one coat it turned out much darker than I expected.

The concho I found is a match for the necklace I usually wear with my Jedi costume, a triskele that symbolizes an inner spiritual journey:
136648347 1F96066E9E

I was hoping to have a new costume ready for Star Wars Weekends, but time is getting away from me. I think my new belt and the boots Scott gave me last fall will at least be a nice update to last year's costume. :)

Saturday, March 04, 2006

Imperial Officer Uniform

Last Update: 3/4/06 - Scroll to the bottom for the most recent notes.

9/19/05

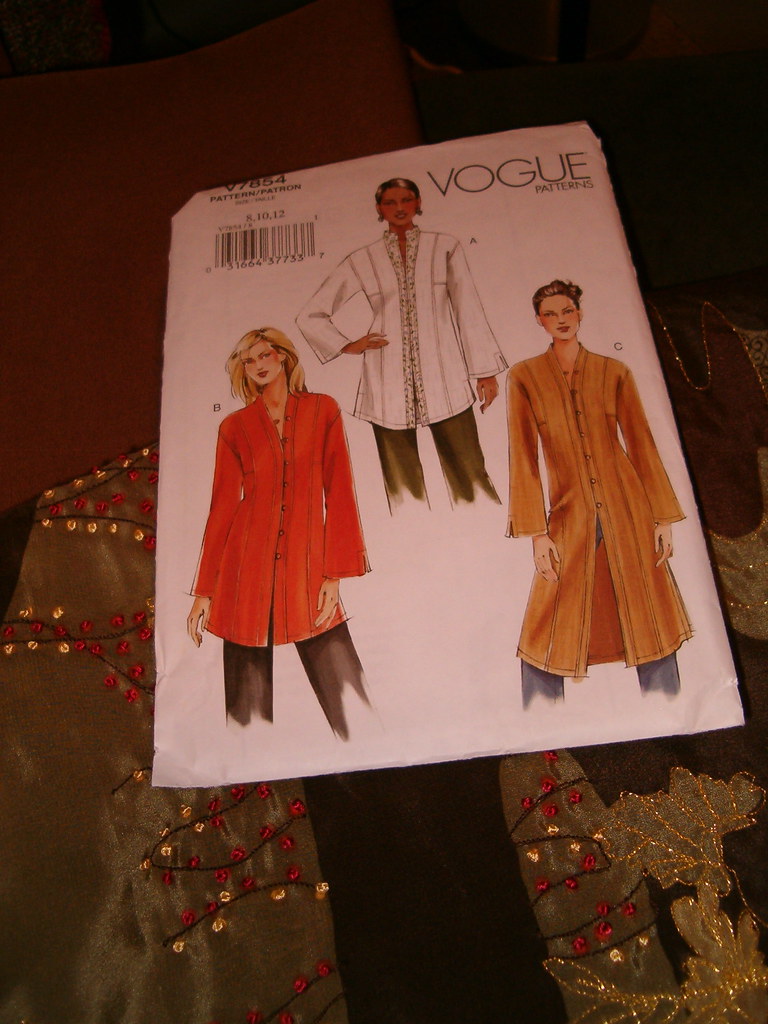
Okay, so I've been meaning to join the dark side ever since doing Star Wars Weekends with the 501st Legion (I'd already joined the Rebel Legion, but I'm figuring to double the fun!). I picked a pattern and assembled a muslin in July. But then I had all those summer and vacation clothes to make, etc... So, back on track!

The pattern I'm working from is Vogue 7978 (which I picked up on a 75% off sale). I chose it because it was the closest to what I intended to create. It's got long princess seams from shoulder to hem, a front overlap, and an option for a stand-up collar. Also, I wanted to start with a women's jacket pattern instead of a man's costume coat; I figured it would give me a better fit and require less re-sizing. Since the pattern is for an outerwear coat and I'm aiming for more of a suit jacket, I cut a smaller size.

The only alteration I made to the pattern before cutting it was to extend the front panel all the way to the opposite princess seam. Once I had it all together, Tina helped me fit it and mark the "V" shape that the front panel would take. That futzed with the princess seam, so I had to make sure to add to the side panels what we were in effect removing from the front.

At this point I put it away until after convention, then kept procrastinating because I had a nagging feeling that it would have been easier to start with a different pattern. When I eventually got it back out last week, it turned out not to be difficult at all. I pulled the muslin apart and marked the front panel changes on my paper pattern, then tried to figure out what to do with the side panel.

After sliding the pattern pieces around like a puzzle, it finally clicked.
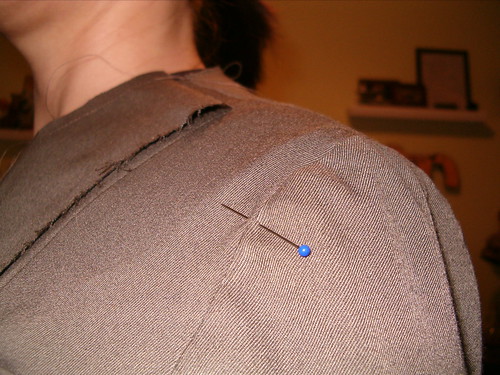
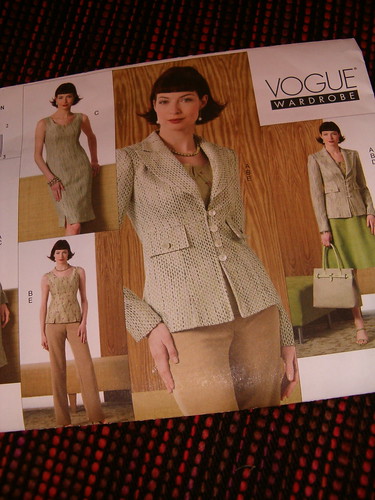
I marked the side panel at the point where the new angled ("V") line departed from the original princess seam, just below the full bust. I laid the side and front panels next to each other, lining up the notches and waistline. I laid a ruler across the waistline of both pieces, aligning it horizontally along the waistline and vertically along the grainlines of both pieces. Then I slid the pieces together until they touched at the point where I had marked the side panel. From that point down to the hem, the center panel gave me the angled line I needed. The amount of tissue I added was NOT the size or shape I exptected, but when I basted the new pieces together, they fell perfectly around my body.


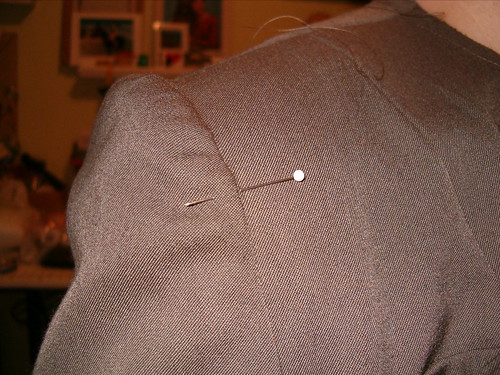
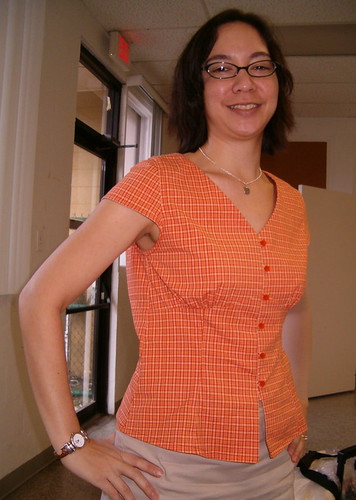
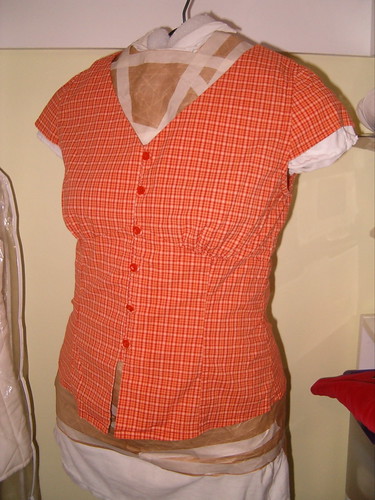
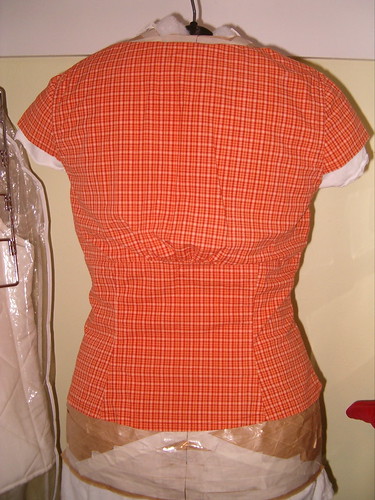
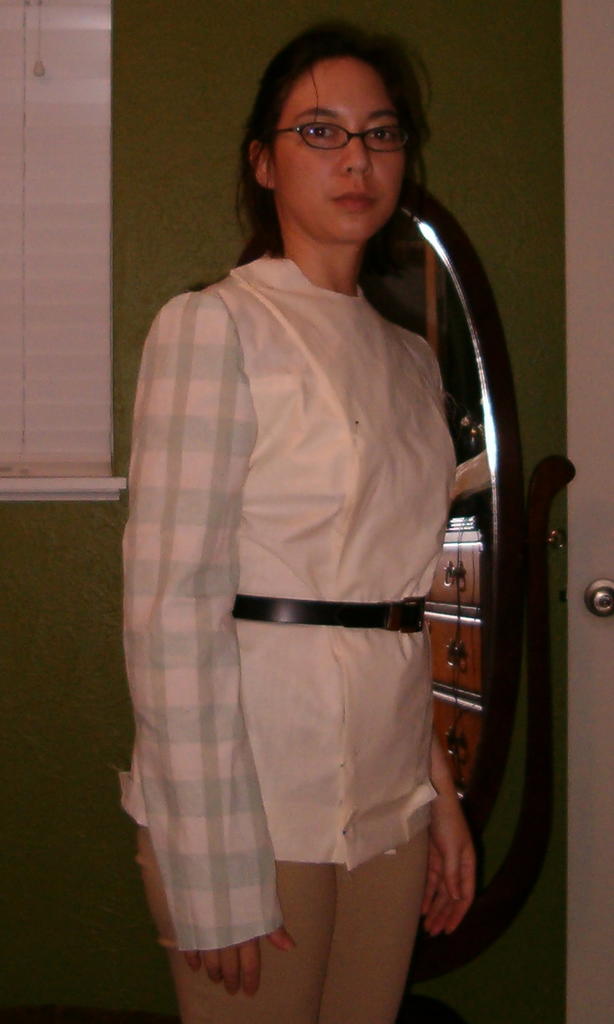
In this photo of the second muslin, I've added the chest pockets (using Kathy's excellent tutorial as a guide, since my jacket construction is different from hers) and re-used the unchanged pieces from my first muslin (the green plaid sheet!). Later I let the hips out a little for ease and decided on a slightly longer (and more flattering) finished length. The whole thing has been transferred to my paper pattern and is waiting for an open slot in my sewing schedule!


Update: 1/25/06
I cut the fabric for the jacket shortly before Christmas, but shelved it again to work on last-minute Christmas gifts. Then came a client project. Last Thursday I finally finished cutting my fabric (I had forgotten the two extra front panels for the facing) and also cut a coordinating lining I found at Sewing Studio. The fabric, by the way, is a 31% wool/67% poly/2% spandex suiting I got at Joann's with my 40% off coupon (it's now on clearance for 75% off!). It's the perfect color and texture, and as a bonus I can wash it, although I'll probably wind up drycleaning to protect the jacket's structure once it's finished.

With only an hour of class time left, I assembled the two side panel/chest pocket sections.

side panel

Above, the smaller piece (top) is the shoulder and armhole. The bottom half of the piece is mirrored from the armhole to the seam, and again below the seam, because this will be folded up on itself to create the pocket (below).


chest pockets

The piece at left is shown from the right side; the seam is the top of the pocket. It is understitched so that the stitching will roll towards the pocket and not be visible from the front. The piece at right is shown from the wrong side; the fold is the bottom of the pocket. There are three layers of fabric in the pocket area due to the folded design. I basted the top of the pocket and around the sides to hold everything in place while I construct the jacket.

I had just enough time to interface my front panels before it was time to pack up. This week I picked up the shoulder pads and plan to assemble the rest of the shell and lining. I'm hoping this will quickly since the whole thing has already been fitted extensively (but I'll check the fit as I go, anyway).

Update: 2/2/06
Last week I put together all the jacket panels, sewed the two-piece sleeves and ease-stitched the sleeve caps. I futzed with the side seams a little to get rid of a "skirt" effect but was otherwise happy with the fit of the shell. Today, however, I decided to take in the back princess seams a little. When I put a belt over the jacket, I didn't like the way the extra fabric gathered. Now it fits closer to the curve of my lower back.

94732519 66C13280D0 B

I also set the sleeves in today:

94656624 5877F75706

94656428 630526B857

This pattern has a LOT of fabric in the sleeve cap; even with the ease-stitching and a shoulder pad, it looks too full to me. The left sleeve (above left) pressed out okay, but the right insists on "poofing". So I'm going to pull the stitching out between the pins, pull the cap up about a quarter inch and trim it off. Oh, and sew it back down.

Finally, Tina pinned up the hem and I pressed a light crease in so I can find it when I go to attach the front facings. Next task will be to assemble the lining, making all the same changes I made to the shell.

Update: 3/3/06
107423302 43C6371079
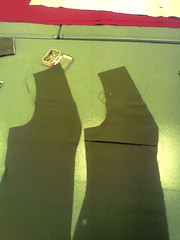
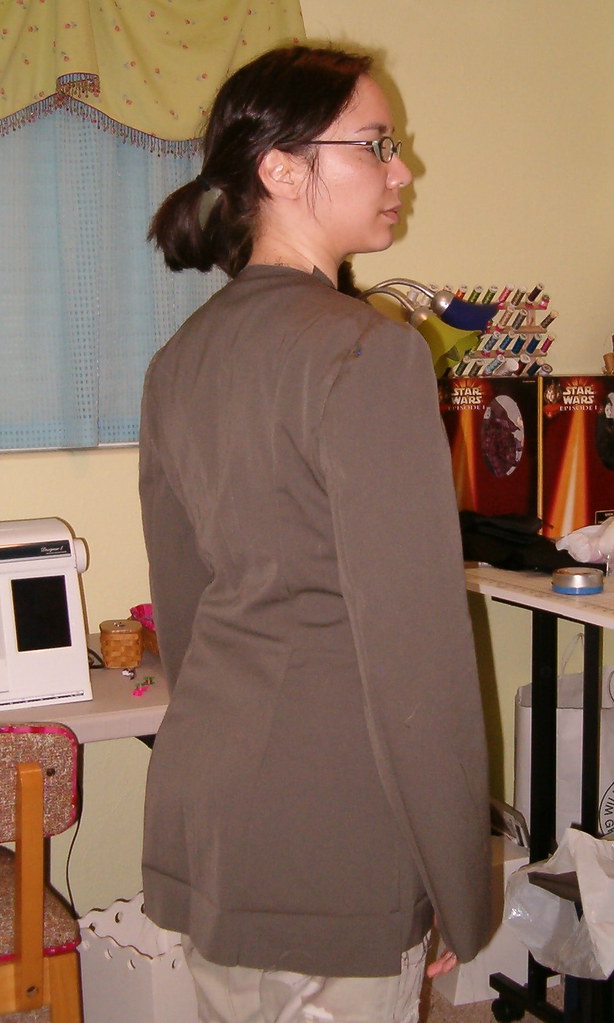
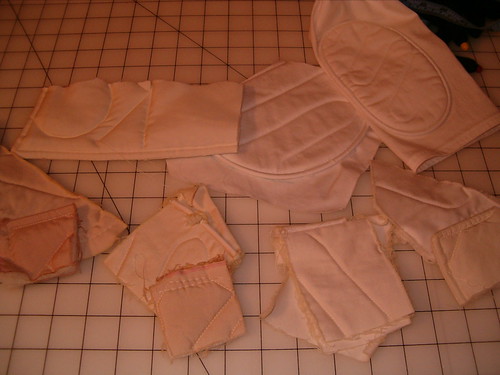
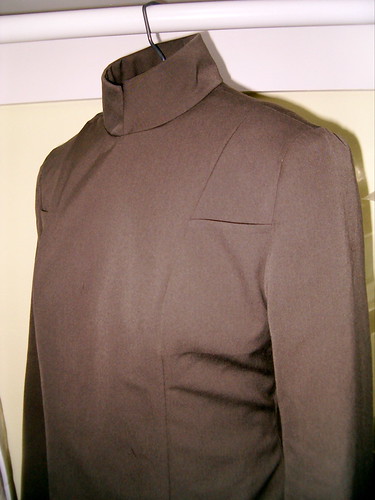
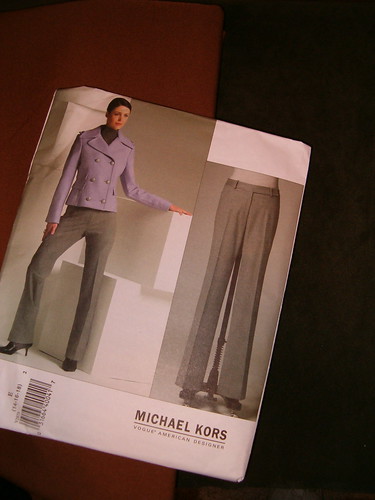
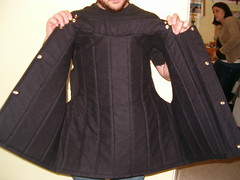
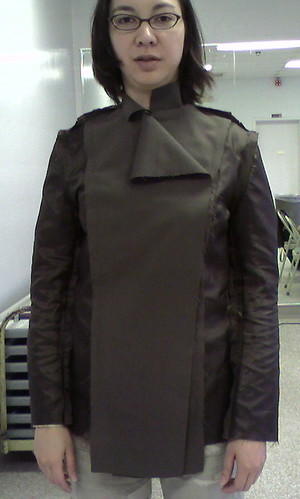
Been squeezing work on this between other projects, so not much new. I did fix the sleeve caps and finish constructing both the jacket and the lining/facings (that's a picture of the lining at left). So all that's left is to stitch the two together, hem and finish. I showed up in class yesterday with every intention of finishing the jacket once and for all... only I'd left the jacket and lining on the cutting table back in my studio at home! Ah well. Fortunately I'd tossed some junk fabric in the car in case I had time to work on something else, so I spent the day mocking-up the jodhpurs instead. I'm using Suitability 2056, unmodified except for fitting. Oh, and leaving out the knee patch, which doesn't change the main construction at all.

I probably ought to start hunting up greeblies, code cylinders, rank insignia and belt materials, so I can have all the costume pieces together by the time I finish the hat!

Update 3/4/06
Found a source for the greeblies, courtesy of the FL501st forum. May also have a source for the rank badge.

Spent a mostly pleasant afternoon putting the jacket together. Note: There is no such thing as simply stitching the jacket and lining together. I always forget about the pressing, the trimming, the notching, the turning, the pressing again... at least there's no topstitching on this one (although I'm tempted, it would look really sharp--just not "cannon"). I'm kind of peeved with Vogue at the moment; I've got a half-an-inch of exposed raw edge on each facing, and I followed the directions and drawings exactly. So I pressed up the hems on the jacket and lining and left them open until I decide how to finish the facings. Everything else is done, except for closures (I'll add snaps to hold the front panels in place, and probably a hook and eye inside the collar).

The finished jacket looks a lot trimmer than I expected; glad I left plenty of ease! Below, a blurry photo on me (I think the navy blue shorts really make the outfit) and a clearer one on my dress form, Xena.
107808728 Ffe65Aa2Dc 107808804 Caa33Bf7F0

Sunday, February 12, 2006

Xena, Warrior Dress Form

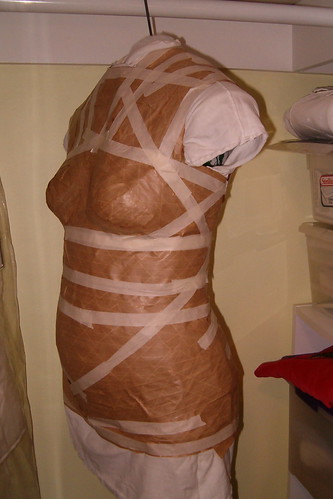
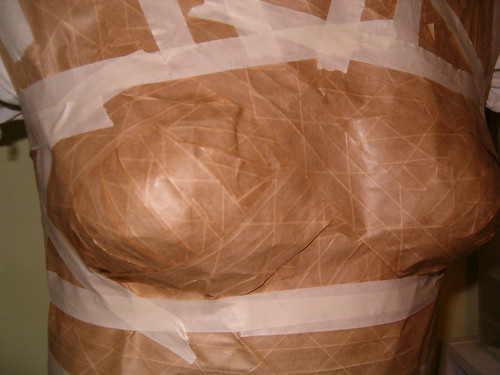
Yesterday Scott and I made a paper-tape dress form.
98121449 C26433A304
I got the directions from this Threads article about a year ago. I had read about duct-tape dress forms, but decided on the paper-tape one because it sounded like it would hold its shape better. We went to two or three office supply stores before we found the paper-tape, the kind you wet to activate the glue. The only kind we could get was reinforced, but we didn't think it would make a difference so we bought it. And it bounced between the office and the sewing room for a year, waiting until we were ready (ha!).

We started with one of Scott's old t-shirts, which I cut down and sewed up the sides to get a snug fit on myself. With a sinkful of water, a sponge, an old sheet on the kitchen floor, the roll of tape and a pair of scissors, we got to work. We had no idea if the tape would adhere to the shirt, to itself, or even be sticky at all. In fact, it was very sticky and clung to the shirt better than it did to itself. The first hour or so was fun experimentation, cracking jokes while figuring out what would work to get around my curves. The second hour I stopped micromanaging, since I couldn't really see what was going on, anyway. Going into the third hour, as you can see from the photo below, I was not a happy camper.
98120868 Ab49Ab1B7A
I was tired of standing on bare feet on the kitchen floor (probably should have worn shoes) and my upper back ached from being held in a single posture by the stiffening tape (after it was over we both soaked in a nice, hot bath!). Instead of giving in to crankiness and snapping at Scott, I grew very, very quiet. In another one of his occasional moments of husbandly sainthood, he responded with concern, asking if I was okay and encouraging me while working as quickly as possible. When I stopped giving directions, he took over and proved more than competent for the task. He came up with two ingenious ways to go over the bust area, the latter of which I thought was rather pretty and, along with the armor-like feel of the tape at this point, inspired me to dub the form "Xena".
98121330 418D5Bceea
When he thought there were enough tape layers to make the form reasonably stiff, Scott hit me with the blow-dryer, which was wonderfully warm after all that clammy wet tape. Then he added some masking tape to loose ends and places that he thought might crack apart when we cut the form off my body. After he eased me out of the shell, we hung it on a hanger wrapped with batting (to support the shoulders) and taped over the cut. We're thinking about filling the hollow form with batting or foam to support the shell, and I'll either decoupage or cover it with another old t-shirt.
98121036 D2458977F1
A day and a half later, Xena has dried nicely and is sufficiently stiff/sturdy enough to wear my clothing. I tried the Imperial officer jacket on her and also one of the tops I made a few months ago (next to a picture of me for comparison):
41795542 83Efbedb3B98571407 D6B1209B6D98571340 56Acb23342
Her measurements are slightly larger than mine, partially due to all the layers of tape, and probably because we didn't wrap very tightly. Dressed, she looks big (life-sized?). But the proportions, body shape and posture look so much like me that it's freaky. I think we goofed a little on the right hip; the tape there wasn't as snug, the shape of the hip is more rounded and garments that fit my real body twist a little on Xena's back right side, going over the hip. We weren't precise with the neck and armholes, so I'm marking shoulder seams/necklines where they fall when the garment is hanging properly from the shoulders.

But for our first try, I'm pretty pleased. She'll be useful for pin-fitting and preliminary adjustments, so I can get some garments cut and partially constructed before I need a buddy to check the fit on my real body.

Friday, February 03, 2006

Colorful and pretty

[Cross-posted to my LiveJournal]
Yesterday I worked on my Imperial Officer uniform. It's coming along nicely, but when I pulled it out of the bag in class I realized: I am SO READY to sew something colorful and pretty! My last three big costume projects have been white/off-white, black, and olive-grey. Time for some COLOR!

I brought back lots of beautiful stuff from Mike's Fabric in L.A. (thanks for the recommendation, Colleen!), but hadn't started planning the garments I want to make. Hancock Fabrics had Vogue patterns on sale for 75% off last week, so I took my swatch sheet and list of pattern numbers gleaned from their website and picked out a few possibilities. Scott, in one of his acts of husbandly-sainthood, came along and helped me narrow it down.

[Click thumbnails for larger photos.]

Here are some of the lovely coordinating fabrics from Mike's. Some of the things I really enjoyed about this shop is how neat and orderly it was compared to the other stores; that prices were clearly marked (with a little wiggle room for making a good deal); and that Erica, Mike's very knowledgeable wife, took the time to arrange coordinating fabric displays on the tables and walls. Four out of the five pieces below were displayed together, which caught my eye and decided me on buying all four.
95022486 E94D20B634 B

Here's another piece I never would have bought if I hadn't seen it draped on the wall:
95022221 D45Cc97285
The print reminds me of a story and I plan to make a long a-line skirt, with the scene running across the bottom of the panels.

Below left, gorgeous soft pre-washed silk dupioni, another Erica recommendation. I knew it would coordinate perfectly with the colored flecks in the butter-yellow wool at right, which has been sitting at home in my stash for a year-and-a-half, waiting for just this kind of inspiration.
95021363 867Afa21C7
I'm thinking of this blouse for the teal dupioni, either the 3/4 sleeve or the view with the bell sleeves, possibly with some embroidery around the cuffs; and one of these skirt patterns for the wool.

Now on to possible matches with the Vogue patterns I picked up last week.
95022738 88D466C22595023497 1Df5Fd484795023095 Fcf1D075A4 B
I love the waistband on the pants in the second photo, with the button off to one side. The top in the third photo, the girls think I should make using the embroidered and beaded silk in some of the panels, with either the caramel-colored rayon or olive-green suedecloth as the main body. I'm not sold on it yet--I was going to use the two solid fabrics for pants--but I'll try draping it and see how I feel.

And two more patterns I picked up just for fun:
95023643 6E087F2B64

Wednesday, January 25, 2006

Catching up

Wow, I've been busy. Mainly keeping up with my LiveJournal friends. Holidays. Being sick, and traveling. But sewing whenever I can squeeze it in!

This morning I updated my Imperial Officer notes (especially for my friend, Gabby, who started her own sewing blog) and my Blogger template to include my new Designer I in my equipment list. Read about how I came to own a Designer I here. Since then I've learned that my machine actually has about 100 hours of sewing time and 22 hours of embroidery time on it (with a total "on" time of around 700 hours), and is closer to 2 1/2 years old, but that the deal I got was below dealer cost and I'm still thrilled!

Over the holidays I took on a new client project, a "flak vest" for a Resident Evil costume. I think it turned out really well (click for larger images):

Esh's vest


vest lining

...and for reference: RE Olivera photo. Esh (pictured in the vest I made) showed his vest around the costume forum and now I have 3-4 more potential clients lined up!

I found out yesterday that Vogue patterns are 75% off at Hancock Fabrics this week. So today I think I'll catalog my L.A. fabric stash and take swatches with me to go through the pattern book. And--woo-hoo--the postman just delivered a big box with the rest of the L.A. fabric I had to leave behind with Gabby! Now, where to stash it until I'm ready to sew...