Star Garb, Episode II: Attack of the Clothes
With Star Garb, Episode I: A New Cloak behind me, I move deeper into costuming territory with Episode II: Attack of the Clothes.
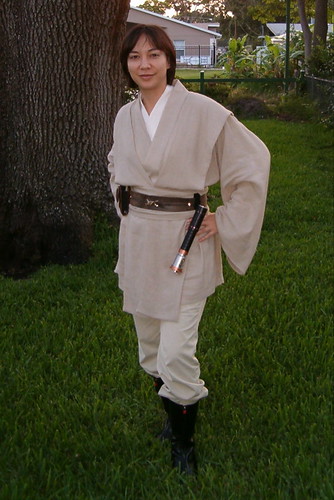
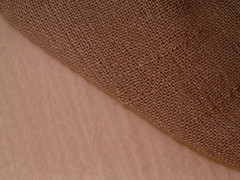
Prequel Jedi garb is all about texture and layers. Pulling off this costume depended on finding appropriate (and affordable!) fabric. So during my original fabric reconnaissance I carried a notebook with sketches and yardage requirements and collected swatches. I hit the jackpot with more $1.99/yard finds: a creamy crinkle cotton, perfect for the inner tunic; and a drapey linen/flax, also with a crinkle texture, for the outer pieces.
Once I decided on patterns, I dismantled my green plaid mock-up cloak and used it to make muslins of the tunics, basting together just enough to determine what changes I would make to the patterns before cutting the real fabric.
I used Folkwear #134 Thai Blouse for the undershirt. LOVE this pattern! Every seam is a straight line, and the triangular panels in front add interest. The panels tie on the sides, which keeps the neckline secured nice and high where I want it. Like the cloak, the front and back are one piece (no shoulder seam), with a seam up the back. Below, the right front/back piece (the left side of the photo is the center back seam).
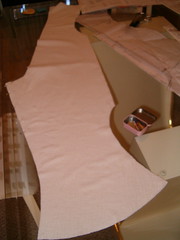
I made only a few minor changes to convert it to costume: (1) Added about 5 inches to the sleeve length and gradually narrowed the last few inches towards my wrist, so it would bunch up. (2) Reversed the position of the ties so the blouse would close properly for a Jedi costume, left panel over right. (3) Instead of sewing the collarband to the wrong side and top-stitching it down on the right side according to instructions, I attached it to the right side and slip-stitched it on the wrong side so no stitches would show. I thought this was the most attractive finish for the crinkle cotton.
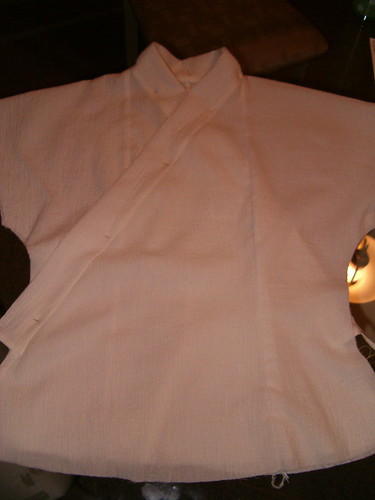
Above, the neck binding pinned in place. As an added bonus, the finished shirt will double as a very pretty blouse in my everyday wardrobe!
The outer tunic began as Butterick 4072. I lengthened the pattern by about 5 inches so it would fall to mid-thigh; discarded the sleeve piece (not full enough) and created my own (24 inches at the hem, which I placed at my knuckles). The biggest change was to the armhole. The original pattern had the armhole seam dropped halfway to my elbow. I wanted to raise it without losing the ease in the body, so after studying reference photos, I decided to put a "tuck" in the shoulder (a la Obi-Wan) by tacking the armhole seamline under at the actual point of my shoulder. Still, there was too much to tuck. So I took my neck-to-shoulder measurement, added 2 inches (plus seam allowances), and made that my new shoulder seam. Then I re-drew the line from the armpit to the new top-of-shoulder.
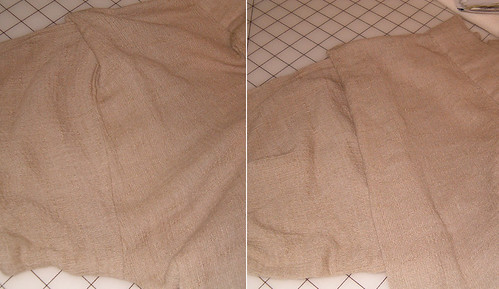
Left, you can see where I tacked the top but I've pulled the bottom out so you can see the armhole seam. Right, the finished tuck. After attaching the sleeve, I wound up tacking the top of the armhole just above the point of my shoulder and along the shoulder seam, so it would lay flat along the slope of my shoulder (its own weight was causing it to flip up that last inch).
The drapey linen was a little tricker to work with, especially when sewing across the grain (and therefore the crinkle). I sewed twill tape into the shoulder seams to keep them from stretching out. I also interfaced the collar band and finished it by hand. On both tunics, I serged the seams and raw edges, minimizing bulk at the hems. I used a 3 inch hem on the full outer tunic sleeves and blind-hemmed them in place.
The tabards and obi are basically long sashes, folded in half and sewn up one side and both ends. The tabards are cut with the grain and the obi on a slight bias. After sewing each piece into a tube, pressing the seams open and turning it right-side out, I slip-stitched the opening closed. I added a tie on each end of the obi to hold it in place until I could buckle a belt over it. With only a day to go before the movie opening, I considered skipping the tabards, but was glad I didn't. They really were a finishing touch, smoothing over the whole look.
Stay tuned for Episode III: Accessories of the Jedi!

0 Comments:
Post a Comment
<< Home