Monday, April 25, 2005

Not your daddy's tweed

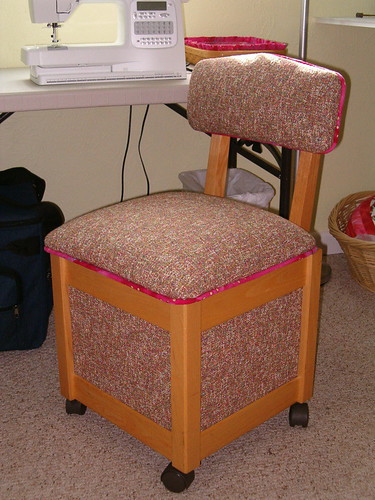
We finished the sewing chair, woo-hoo!
chair-after.JPG
My friend Mimi found the fabric at a 75%-off sale at Boca Bargoons. From a distance, it read like a tan tweed; but when I took a closer look I saw it had all the bright colors of my sewing room in it, including lime green and hot pink. Definitely not your daddy's tweed! The piping is made from the same pink polka-dot batik as the basket liners (one of which is visible on the table above the chair).

I had never reupholstered anything before, so I was a little intimidated at first. But it turned out to be pretty simple and I had a lot of fun (except for getting sore fingers pulling out the old staples--easily the most time consuming part of the project!). A staple gun powered by an air compressor and a cordless drill (with screwdriver bits) certainly moved us along with a minimum of elbow grease!

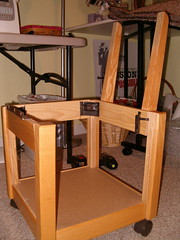
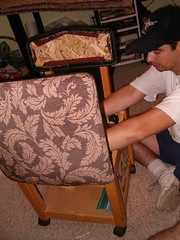
We began by taking apart the old chair, which I rescued last fall for $30 from a fabric store going out of business.
chair-before.JPGchair frame.JPG
Scott was impressed with how well-made it was; I just like that I can roll between my sewing machine, serger and ironing board without getting up! Plus it has a handy storage compartment beneath the seat, which is hinged.

Originally I was going to slipcover the seat back, because I couldn't figure out how it was put together. Turns out it's in two pieces; a flat piece (visible in the above photo) attaches to the rails, and the padded back screws into that. Clever and simple. We covered those two pieces separately and sandwiched the piping between.

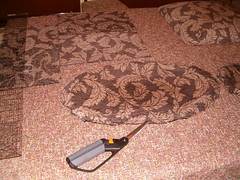
The chair had been reupholstered once before. We removed the brown fabric, but decided to leave the original maroon on the cushions to hold the shape of the foam. I used the old pieces as templates to cut out the new ones, adding a couple of inches so we'd have something to grab and stretch over the cusions.
cutting the chair fabric.JPG
Would've worked great if I hadn't mixed up two of the pieces!
old seat.JPG
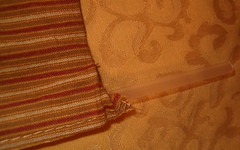
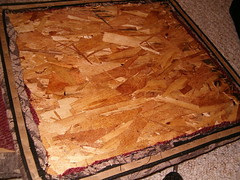
We removed a zillion staples from the old seat (above); one set held the fabric in place, another secured the piping, and yet another held a cardboard strip to the piping. This turned out to be a neat trick which I copied (recycling the same cardboard strip) on the new seat (below).
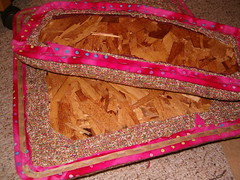
new seat.JPG
The recycled strip of cardboard provides an edge to help the piping stand up. This is important because the backing board that covers the seat is cut too small to reach the edge.
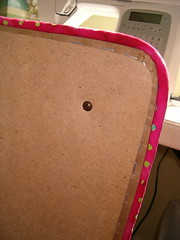
seat backboard.JPG
See how the cardboard strip makes up the difference?

The panels that cover the storage box simply slipped out of their grooves in the frame. We peeled two layers of fabric off to reach the bare board and used spray contact cement and a brayer (borrowed from my stamping tools) to apply the new fabric.

I had to take a break partway through the process because Scott and his dad needed the air gun to work on the roof (priorities!). I used the time to pin the piping in place, using upholstery t-pins I'd forgotten I owned; and clean out the castor wheels, which had yards of old thread wrapped around the axles from years of use in a sewing store. When the men took a break to move scaffolding from the backyard to the front, I snagged a few minutes with the air gun to staple on the piping. All that was left was to reassemble the "new" chair!

Wednesday, April 20, 2005

Cranberry Cottage Liners Complete!

The finished basket liners:
basketliners.JPG

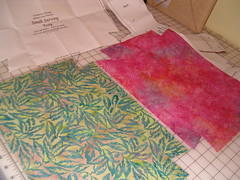
A brief review of the patterns: They were reasonably easy to work with. All are one-piece construction, which is pretty cool except it seems like a waste of fabric.
traypattern.JPG

Still, I was able to squeeze lining (for the reverse side) for two of the baskets out of the leftovers. Also, I made fabric ties instead of using ribbon. I assembled the liners using the 1/4" seam allowance called for in the patterns, but attached the lining with a 3/8" seam allowance, only because that's where I basted the ruffle and I wanted to hide that stitching!

I had a little trouble with the Small Gatehouse liner. First, I cut off the little flap designed to fold over the edge between the handle straps. The Tall Key didn't have that flap, so I figured they might as well match, and it was so small I didn't want to fuss with it anyway. Then the cutout wasn't wide enough to fit around the handle, so I opened it up a good 3/4" or more, but it still seems barely wide enough. The cutout section is stretched taught and the whole collar is tight. It looks fine, but if I ever make it again I'll have to re-think that.

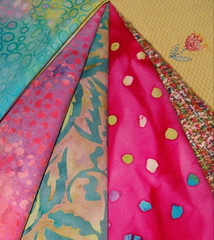
Have a look at the fabrics I'm using in the room, I'm so pleased about how it's all coming together:
batiks.JPG

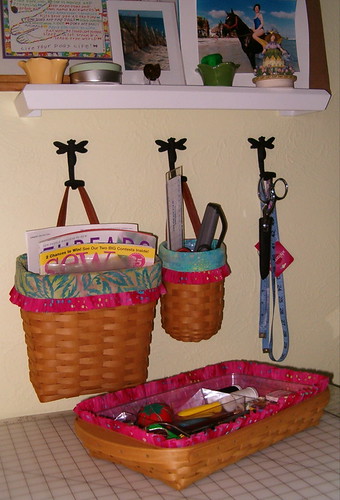
It all started with the lime green fabric scattered with embroidered tulips, on the far right. I made a window valance with it, and hung it on the same honey-bee hooks as the baskets. The hot-pink polka-dotted batik was next. Margaret Q at the Sewing Studio helped me choose batiks that coordinated with the polka-dot colors for the basket liners. It was her suggestion to make the chair piping polka-dot, too. The tweed-looking stuff next to the tulip is going on my chair and bulletin board. This stuff is so NOT like the rest of my house, which is all olive and gold and burnt orange. I call it "my little girl's room"!

Tuesday, April 19, 2005

Funky Feet

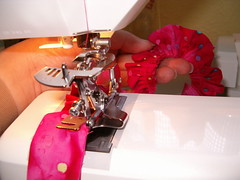
Got a funky new presser foot this weekend: The Ruffler.
TheRuffler.JPG
I've entered the next stage of decorating my sewing/craft/storage room, which is fabric basket liners and accents. Stage 1 was organizing the closet; 2 was curtains; 3, paint and shelf-hanging; and the next two stages after this involve re-covering a padded chair and re-finishing picture frames. Future projects include replacing the window and maybe hanging a built-in ironing board. Anyway, this weekend I was looking at making about a mile of ruffles for basket liners. I basted about six inches of my fabric strip and suddenly remembered there might be a presser foot to make this go faster. I looked it up in my handy-dandy accessories guide and called my Viking dealer.

"Hey, Donna, do you have a--" glancing at guide, "gathering foot?"
"Let me check..." Pause. "I did, but I sold the last one. What are you working on?"
"I need to make about a mile of ruffles--"
"OH! Oh, you need The Ruffler." I swear I heard the capitals on that. "Once you use The Ruffler, you won't even look at a gathering foot."

Turns out The Ruffler will do everything a gathering foot will and more, which was reflected in the cost (but I got a good discount, benefit of having a good dealer!). Unlike the simple snap-on feet to which I've become accustomed, The Ruffler resembles some sort of tiny steel trap or torture device. There is a scythe-like piece that tucks the fabric in every few stitches (you decide) for perfectly even pleats, and a turn of a screw determines the fullness of the gather/pleat. I could wish for markings on the screw, so I could record my favorite settings, but overall it's pretty cool. You put a flat strip of fabric in the front end, and ruffles (or pleats) come out the back! You can even ruffle a piece of fabric and simultaneously attach it to a flat piece.

My hot-pink polka-dotted ruffles will coordinate with pink polka-dotted piping (say that five times fast!) on the padded chair. I learned to make piping in class last Thursday, using another handy little presser foot, the zipper foot. After first learning to determine how much yardage I needed for my ruffle strips, cutting that off my polka-dot fabric, and then learning to make bias strips from what was left, I sat down to sew the piping. Tina said it was easier not to pin, just to feed the bias strip and cording as I went, and she was right. It was almost relaxing, sort of zen, kind of fun, and I wound up with something resembling a polka-dotted snake. It's just hard not to be happy coiling up a pink-polka dotted snake!

Saturday, April 16, 2005

The Next Useful Thing

I've posted another sewing-related insight in my "deep thoughts" blog, Sojourn. It's about doing The Next Useful Thing. Enjoy!

Tuesday, April 12, 2005

At Last

I've been hanging onto this half-yard cut of gold damask for over a year now. At last, all the pieces come together into my gold-striped bodice.

HPIM2593.JPG

Boy, do I look flat in this picture...!

The inspiration to finally cut and sew was finding a really cool striped cotton remnant for the lining, which coordinated perfectly with the gold and added a bit of whimsy. You can't see the stripe in this photo, but the bodice is fully reversible. This was to have been my only bodice project this season, but my preferred supplies didn't arrive in time and I whipped up "Plan B" while waiting (see previous post). It turned out to be a good thing as I made one last adjustment (lowering the bottom of the armhole) to the final garment. For some reason, this piece wound up having a noticeably looser fit than the comfortably snug Plan B bodice. Lighter fabrics (I interfaced the lining)? all the handling? a different undershirt? Will see how it wears after a wash and press...

After learning how difficult it is to turn a bodice inside out with the front boning sewn in, I left an opening to slip it in afterwards. This worked out even better than expected, and I was able to turn a really nice square corner in the center front by tucking in the seam allowances and edgestitching them closed:
HPIM2592.JPG

The 3/16" antique brass grommets came from Grannd Companies & Grannd Garb. They have a great selection of sizes and colors, nice alternatives to the tiny 1/8"s and large, shiny 1/4"s available at local craft stores. Note: the hand-held Dritz grommet setting tool does not work on these! With Scott's help, I installed these using an eyelet setter and finisher I got years ago at Impress Rubber Stamps. The finisher is especially important because it rounds down any sharp edges left after setting the eyelet.

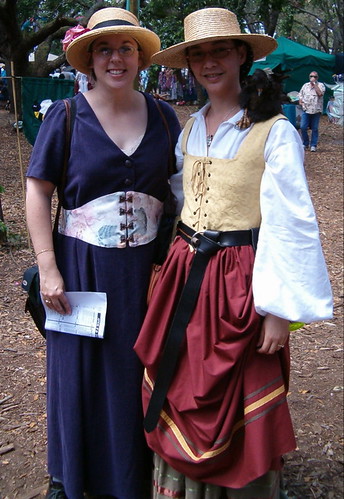
Also wearing: Ring belt from Sofi's Stitches; skirt hikes and small leather pouch by The Crimson Chain; beaded snood by Lady MacSnood; Woodbaby Puppet by The Midsummer Knight's Dream; Scott's shirt and two layered skirts described in other posts. Oh, and my favorite straw hat, which I bought for my honeymoon almost 11 years ago!

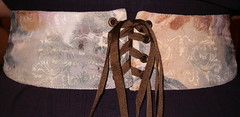
Laura's purple dress is a Butterick pattern I made as a Christmas gift (delivered in February!). The fabric is wonderful stuff, with a crinkle texture, a suede-like feel, and a nice weight (I love the feel of heavy clothes). It was her idea to add a cincher for a look in keeping with faire, and even more brilliantly, her idea to split it into two pieces and have it lace in the back (partially for a custom fit, but mostly so we could use these great clasps she fell in love with in the front):
HPIM2639.JPG copy

The cincher started out life as Simplicity 5359. In the back, we cut down the center back line and added a seam allowance; added an inch and a half to each side for extra room (which turned out to be unnecessary); moved the last set of boning to the center back edge; and added grommets for lacing. The only change in front was to hand-sew the clasps. I edge-stitched around the whole thing but decided not to top-stitch along the boning so as not to spoil the pretty look. For this reason, next time I'll need to be sure to stitch the bone casing more securely to the lining first.

Plan B

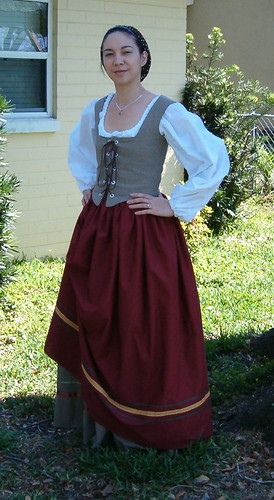
Reversible bodice, chemise and skirt completed March 2005, mostly in one week's time:
march05 garb

Costume supplies for my gold-striped bodice (cut and waiting to be sewn) did not arrive as planned, so on impulse (i.e., sifting through the "value flatfolds" at JoAnn's), I whipped up Plan B. As it turns out, I used this "back-up" bodice to work out construction issues I didn't know I was going to encounter! Chief among them: how NOT to turn a bodice inside-out AFTER sewing in the boning... I also experimented with edge-stitching around the entire thing and like the way it holds the edges nice and flat.

The impulse-generating fabric was a home dec 100% yarn-dyed cotton in olive with a grid pattern woven in, a perfect match for my new olive skirt. The reverse is a sturdy green twill (60/40, I think; it was the day before St. Patrick's and I was in the mood). Total cost of both cuts was ~$5.00 (can't beat that with a stick!). Both fabrics were fun to work with and took my rough handling in stride!

The skirt and chemise I made to while away the time waiting for bodice supplies that never arrived. After cutting Scott's shirt out of tissue linen--which I had also stashed for over a year--I had exactly enough left over to cut a chemise, using Dawn's chemise pattern (and liberal application of my serger!). In the future I need to add a couple more inches to the sleeve length; unlike the shirt, the top of the sleeve is drawn up onto the shoulder into the neckline, so that took some of the fullness away from the wrist. Incidentally, tissue linen's wonderful stuff; part-cotton, part-linen, light, cool and comfy. Wore it all day and felt cooler than in most of my t-shirts!

The rust skirt (layered on top) was inspired by the light olive skirt I had just purchased from Dawn (her patterns really are the least-fussy and most effective way to put things together). And the ribbon design came from my quilter classmate Nina, who's good with combinations like that.

Saturday, April 02, 2005

Strange Fascination

I've written a little about my unlikely fascination with sewing in my "deep thoughts" blog, Sojourn. You can read about it in the post entitled The Process (as I write, it's the only post; perhaps I should combine the two blogs and be done with it!).