
Hoth Leia: Vest
Update: 11/20/05
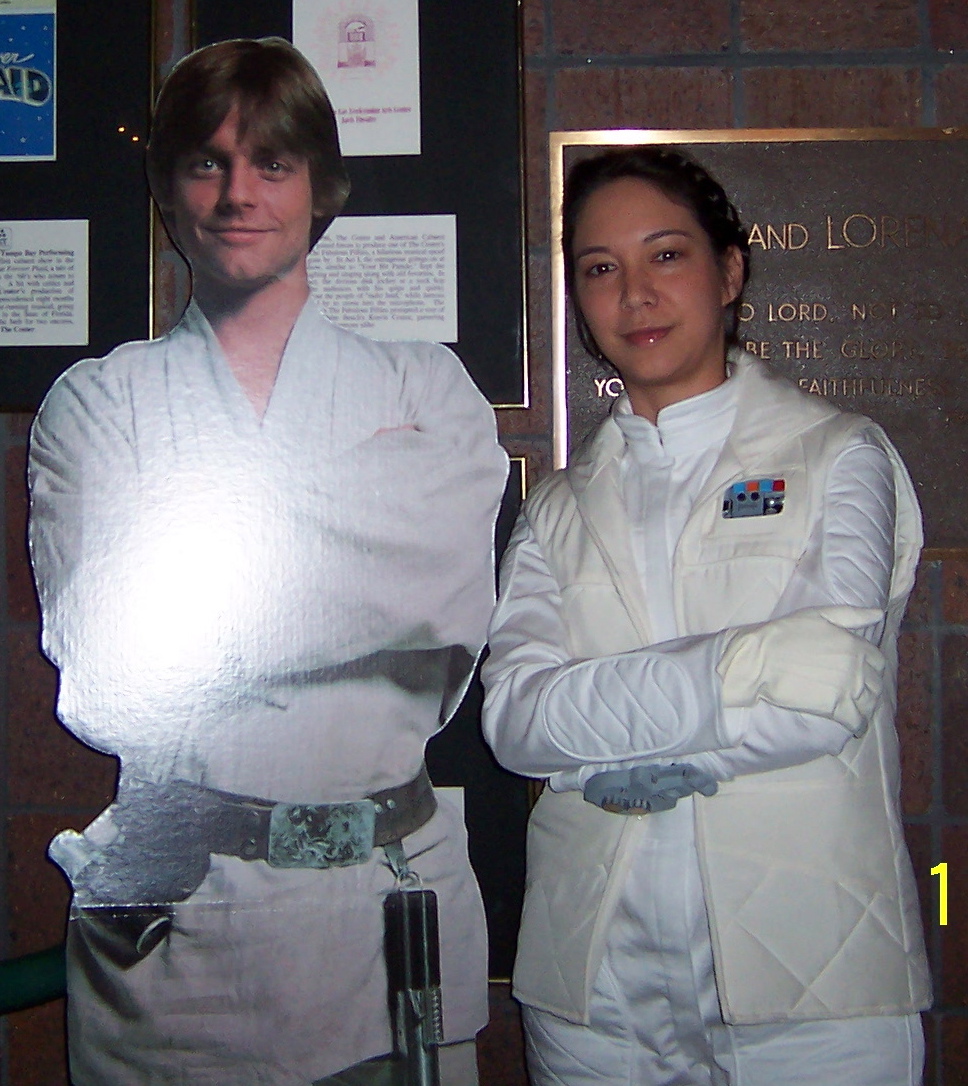
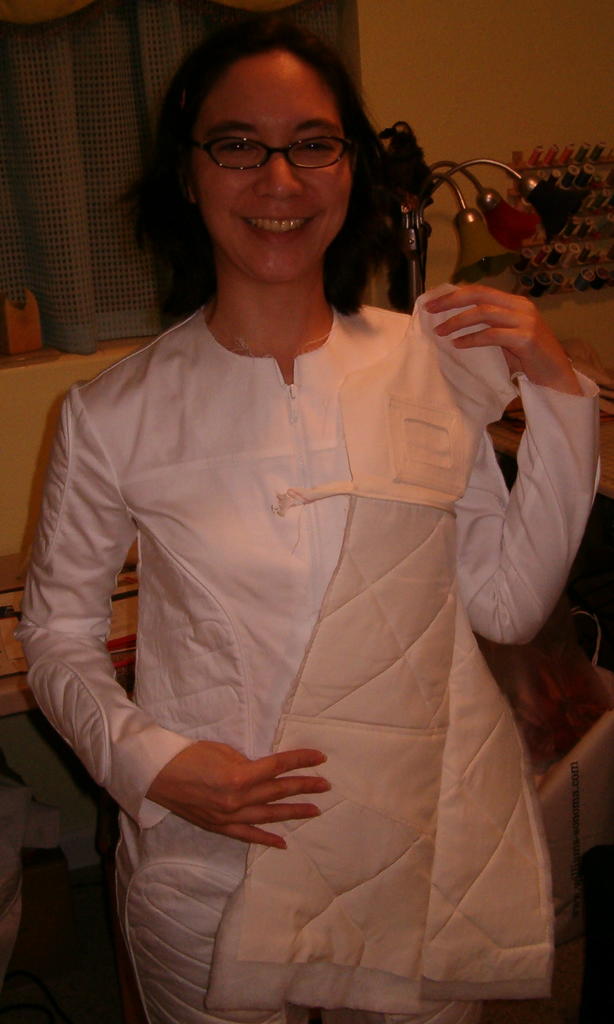
Wow, can't believe it's been almost a month since my last update! I finished the vest on October 28, a scant 3 hours before I debuted it at my costume party! (Photo above is from The One Man Star Wars Trilogy event.)
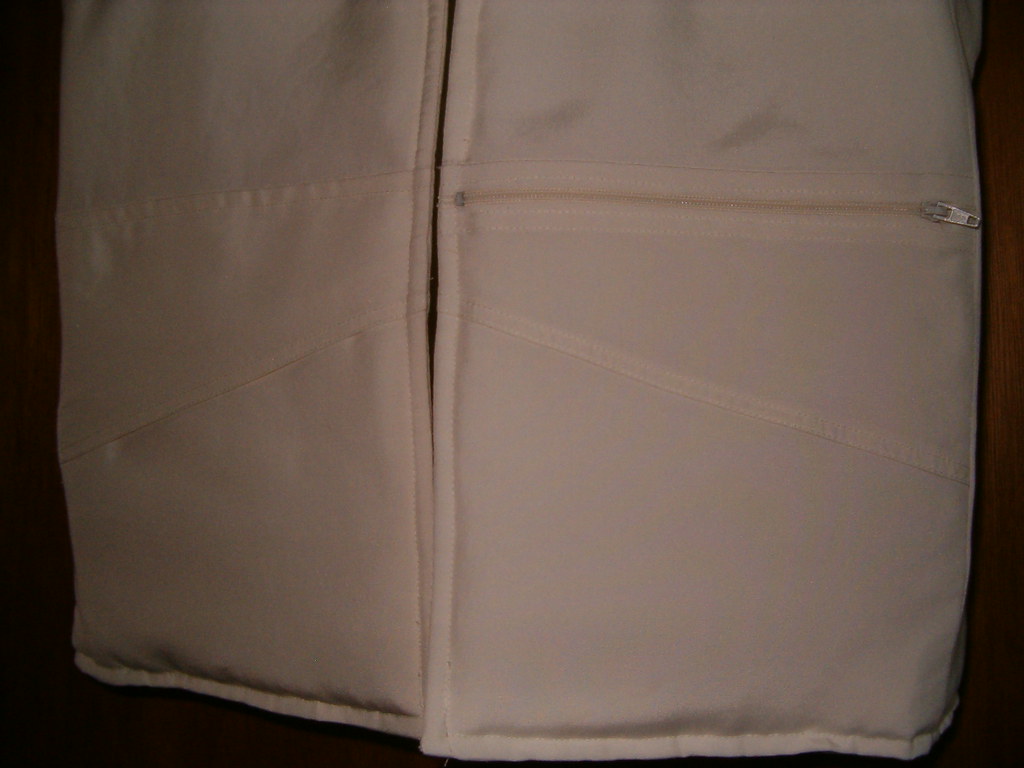 Before I could put the vest together, I needed to finish the final detail: the spy pockets. I got to them a day later than planned, and a good thing, too; I woke up that morning with the best idea I'd had for them yet (this has been a theme for this entire costume!). Instead of trying to hide patch pockets, I created mirror images of the outer pocket flaps on the inside. One pocket is a functional flap; the other is a zippered rectangle made of two pieces to look like the flap (amazingly, I had a 7" natural zipper in my stash!). When the vest was done, both interior pocket "flaps" exactly matched the exterior ones! And I have nice, secure places to stash my personals. :)
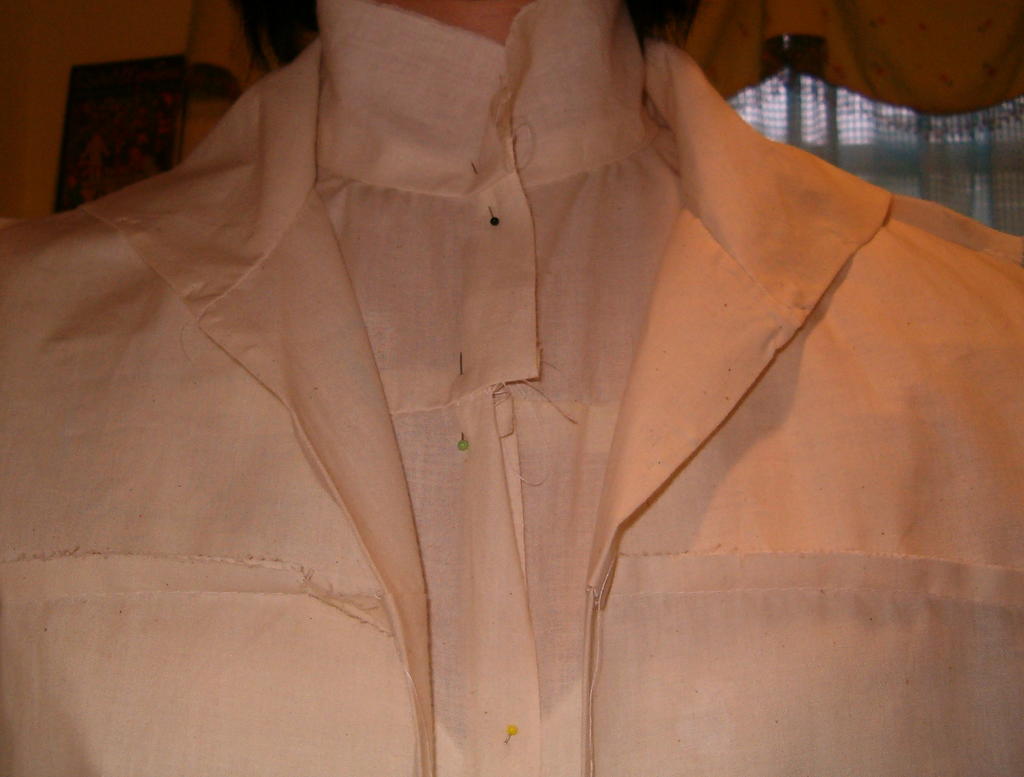
 The main pieces all went together according to the pattern instructions, except for the collar. I put the collar together before attaching it to the neck, since otherwise the piping would have been sewn in with no way to turn it out. After trimming out the excess batting, I understitched the collar lining, to keep the fat seam allowances from popping up and creating a ridge around the collar. They turned out nice and flat. Now I had something resembling a piped pita pocket (the curved edge sewn together, and the neck edge left open). I sewed each half of the collar to its corresponding neck--the quilted undercollar to the vest, and the top of the collar to the lining (it sounds backwards, but the collar is always worn with the "inside" showing). I wound up with the vest and lining hanging from the collar right sides together, and sewed the front edges together as per the pattern instructions, skipping the collar. It took some finagling but it turned out nice. In this photo, the whole thing resembles an upside-down "Y", and actually looks like the pattern image!
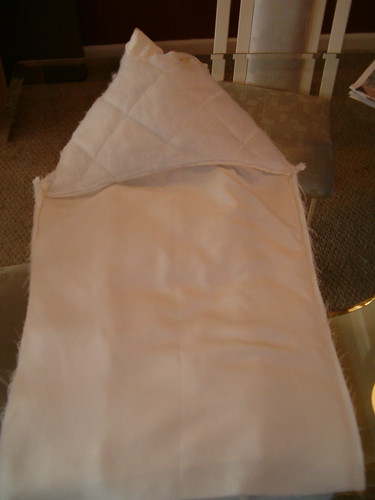 I was able to follow the pattern instructions for attaching the lining to the vest from there forward. Everything went together beautifully (with the walking foot), and I think I'll use this method for future vests, bodices, etc. whenever possible. It's sure easier to turn up a hem than to close up the armholes! When I got to the final step, the entire vest was enclosed in the back lining, which reminded me of Louise Cutting's "burrito roll" (method of attaching a yoke); so I called it the "enchilada" (photo at left)!
Finally, hems! I wanted to turn both hems up to the inside and topstitch them, instead of doing a double-fold hem. I didn't need an elastic cord casing and I thought it would look nicer. So I trimmed the whole vest up to my desired finished length plus a large seam allowance, and pinned the vest and lining until they hung properly. The only problem was, because the back lining seam went through all layers of the back/side back pieces, I couldn't turn it up without picking some of it out; and no matter how much I picked out, it wouldn't turn up, because all the seam allowances turned towards the center back. I clipped one of the seam allowances on each side so it would turn to the side-back piece, and hemmed the vest in three sections: the two front/side pieces, and the back section. So there are tiny little exposed sections that I need to go back and slip-stitch closed.
Also, I skipped the step that attached the two collar halves on the inside by sewing together the seam allowances; so I'll need to go back and stitch in the ditch a couple of inches along the neck to hold them together. Probably won't get around to that until I have to send it to the dry cleaners!
The final vest turned out so luxuriously nice, Tina and Lisa suggested I find a nice brooch to hide the velcro in the chest ID pocket so I can wear it out with jeans! I'm debating removing the velcro, if I can think of another way to attach the ID... perhaps jewelry pin backs, like on a tie tack?
Update: 10/19/05
This morning before class I topstitched the pocket flaps down. They turned out really nice and were what caught Tina's eye when I pulled the pieces out in class:
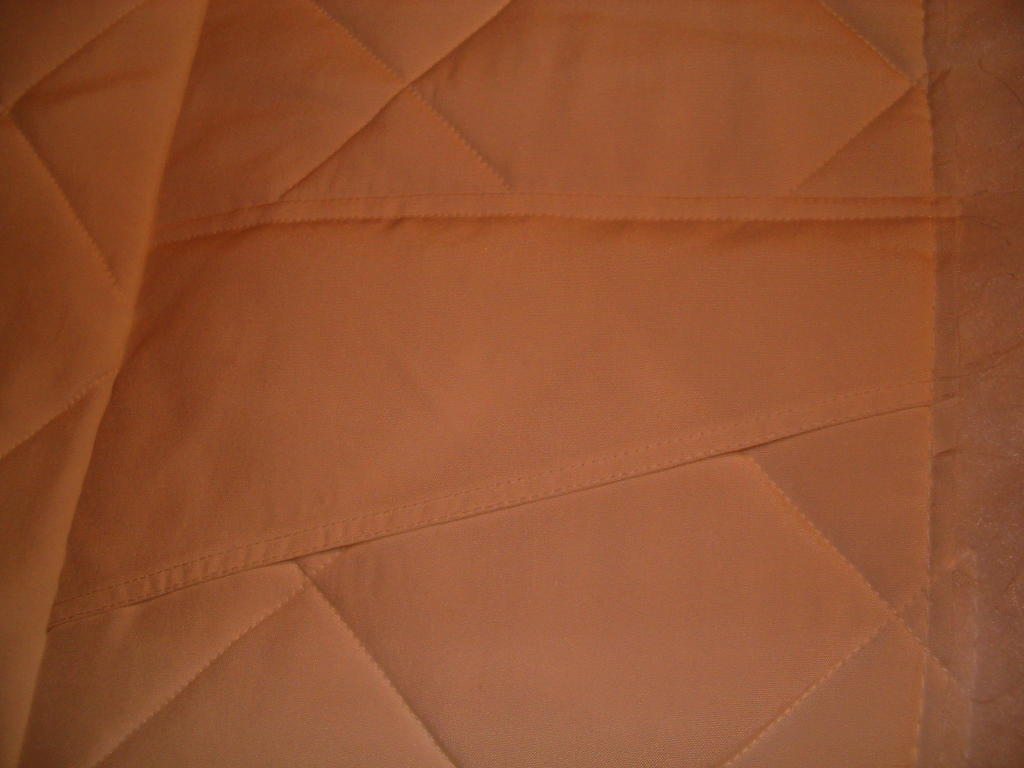
If you look at the seam on the left, you can also see how nicely the quilting lines up across the seam, thanks to Scott! Last night I had the pieces basted together and laid out on the table, trying to figure out how to draw the quilting across seams that aren't straight lines. He suggested drawing the first two lines from the outside (front edge) to the middle (center back), then working outwards from there. (Click below for a larger image; the quilting lines are in light blue.)
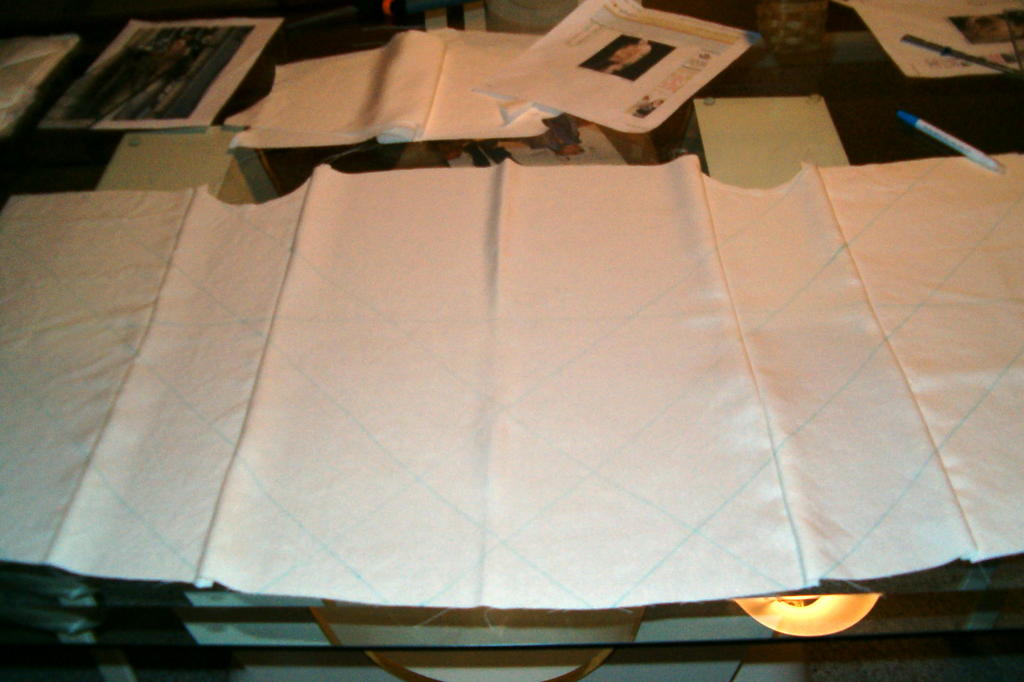
We did a little fudging around the curves, but the front panel squares are all on 45-degrees and it looks fantastic (as far as we could tell from reference photos, the quilting lines don't match up. We just thought it was a nice touch.). The funny thing is, I had hoped to get to this part earlier in the day; but if I had, I would have missed out on Scott's most excellent solution.
With all the detail work done (except the spy pockets, I keep forgetting them), today I started putting the major pieces together. I'm mostly going to follow the Jalie pattern instructions on this, although I'm not sure I'll understand how they get the lining in there until I'm actually at that step. It looks like an ingenious way to get the armholes stitched while they're still flat, and I'm all for that! The one thing I'll have to change for sure is putting the collar on *after* the lining instead of before (the collar piping interferes with the pattern method). I've also decided to shorten the length and hem it differently.
I'm really happy with my fabric choice on this. After prewashing, it kept its sheen but took on a soft, smooth hand, almost like sandwashed silk. With the quilting, it really has that outerwear look and feel, and I think the color is just right.
My love affair with "Piper" (the piping foot) and "Walker" (the dual-feed foot) continues. They are a cinch to use and really help everything go together without a lot of effort. Oh, and the water-soluble disappearing ink pen is the best thing since sliced bread!
Update: 10/18/05
A good day's work:
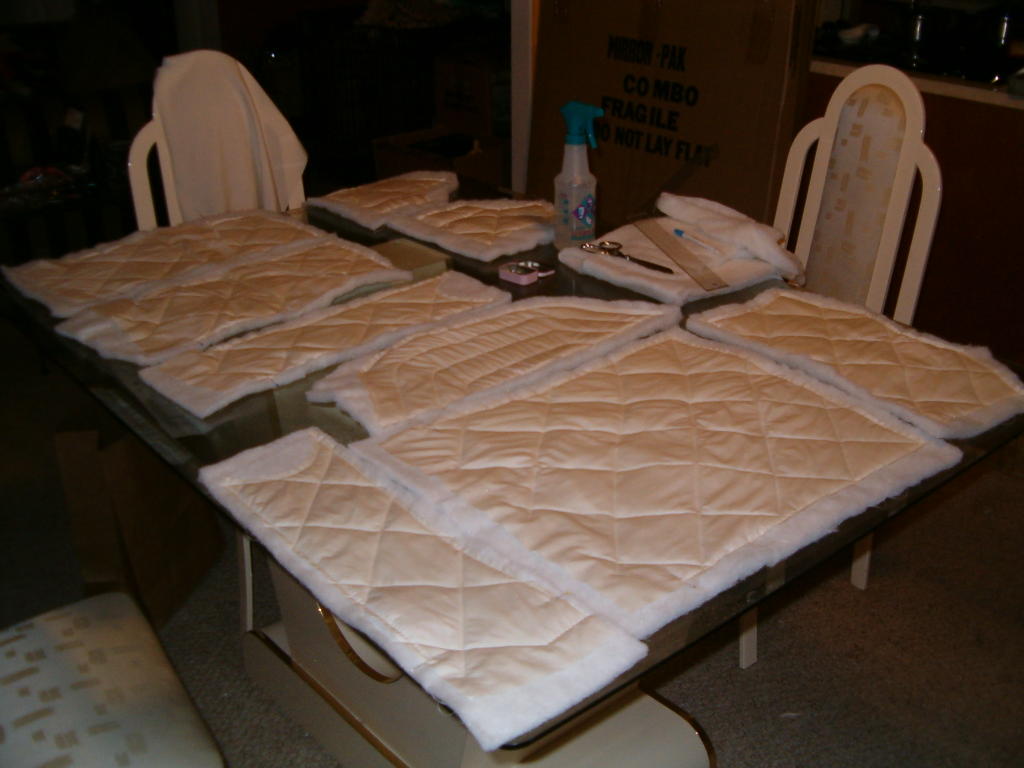
The three yoke pieces and collar are actually the lining. No quilting is visible in reference photos, so to keep the batting from shifting I decided to quilt the lining.
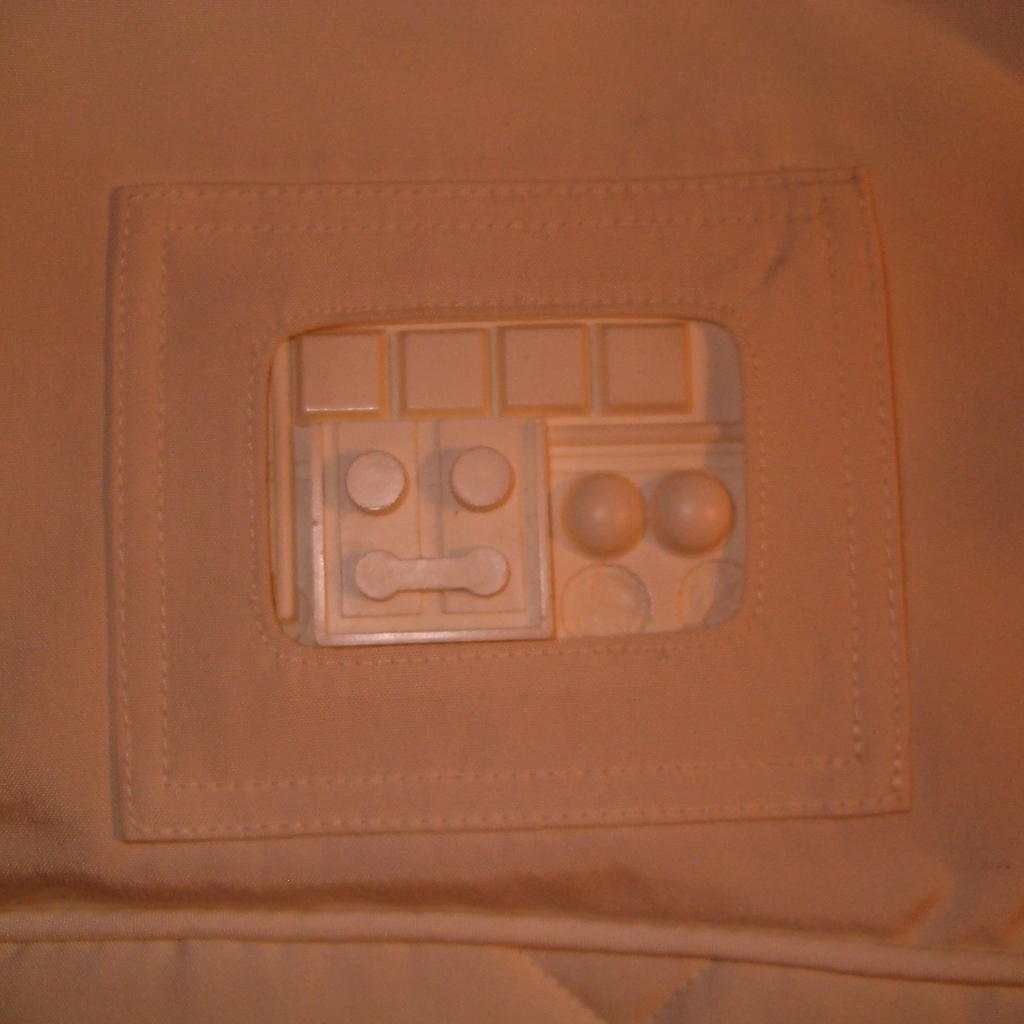
Also today I made all the piping, the chest ID pocket (my props arrived from Corellian Exports last night, yay!), and the front pocket flaps. Lots of detail work, slow going, totally worth it.
zzzzZZZZZZZ.......
Post: 10/05/2005
For Hoth Leia's vest, I'm working with Jalie #2450, which is just about as close as you can get to the real thing! Other than eliminating the zipper/placket and changing the shape of the collar, the only adjustments I plan are cosmetic (different quilting pattern, and add the chest ID pocket). After looking at a few more reference photos, I've also decided to add faux front pockets. I'll probably add spy pockets on the inside for stashing money, ID, car keys, etc.
Today in class I basted together a muslin and checked it for fit. For once, I'll actually be making a pattern all of one size, instead of multi-sizing it to fit my hips! For the collar, I followed the pattern at the neckline, but ignored the top edge and cut it way huge. Then I basted it on and stood in front of a mirror with reference photos while Tina drew the right shape (which appears to continue the line of the vest front edge). I'm thrilled with the outcome:

Lastly, we drew on the chest ID pocket. While I'm waiting for my Denver Fabrics order to arrive, I'll draw the quilting and faux pocket lines. Otherwise, I'm done until I have the fabric in hand.
posted by highpowermom @ 1:47 PM
![]()
![]()
0 Comments:
Post a Comment
<< Home